This was a major step for me. Until this point I had only ever done traditional printmaking techniques ON TOP of inkjet prints. Or I had made prints, using traditional printmaking techniques (mainly intaglio) and then incorporated chine colle (which were inkjet printed onto
lightweight Japanese paper).
My hesitation had been somewhat coloured by my apprehension with regard to feeding 'foreign bodies' so to speak, through my expensive
Epson R2400 printer. I mean I didn't want to wreck it.
I started the image from scratch with this objective in mind, i.e., that I would overlay the inkjet on to the proof. So I guess the print started its life inside the computer with the 'overcoat'.
Physically - I started with the figurative image well that is, in terms of actual preparations . I made a positive in Photoshop as a bit map, to put onto the light exposure unit we have at FDPW. It's a very basic one but I am familiar with using it by now.
My aluminium plate was first degreased, then I applied a layer of roll on "Fotec", photo etch, emulsion. This was put to dry, in our drying cabinet. I got the emulsion from I
ntaglio Printmaker suppliers in London. I like that I can phone them if I have difficulty with this process (although I am used to it by now so don't need to) but when you are starting out its really helpful to have that technical back up.
Once dry it was removed and allowed to cool to room temperature. Then I put the light box on to heat up, ours takes ten minutes.
When I do any printmaking process that requires precise measured timeing - I find it is essential to have a digital timer, otherwise I get distracted especially if I am talking to other workshop printmakers.
I then put my positive which is printed onto inkjet acetate and place it over my plate which has the dried, cured emulsion on it. Masking tape is stuck onto the back/side, to keep these together and in place.
Onto the glass top U.V. lightbox, I place the items - in this order
my positive on acetate then my "foteced" plate then black paper or foam
On top of which, I put some weight to enable the plate/positive to make good contact with the UV light source.
This is in the form of a batch of old metal plates that we keep by the UV box for this purpose.
I then expose the plate to the UV light for 3 minutes. I forgot to mention that I have already prepped the washing soda crystals mix, for developing the plate - after it has been exposed.
It's a mix of 10 grammes of washing soda crystals to 1 litre of water (room temperature).
Having said that , in fact, personally, I always add a little boiled water from the kettle to the measured out, washing soda crystals to make sure they are dissolved and then I make the mixture up to the 1 litre mark, on the plastic jug.
That was all I needed ( I mean, 1 litre) as it was a small plate and I had a small plastic tray to develop it in. I also put some water (room temperature) , in a similarly sized plastic tray to drop the plate into after it has been in the developer.
Once the plate has been developed in the tray with the soda crystals and 'looks' right, I rinse it in the other tray.
OK.......... once that's done I put the plate to 'cure' on the UV box. I leave it on there for about 5 minutes. Then it's ready to put into the mordant.
Being as it's an aluminium plate, it is put to etch in a mix of copper sulphate crystal powder and a measure of salt.
I still am so pleased that I can do this at home as and when I wish. It's great not to have to go into the workshop to do this. This must be so great for those printmakers who are miles and miles away from an open access print workshop or who maybe cannot afford the costs.
The other good thing where etching aluminium is concerned, and one of the reasons I wanted to get used to doing etches with it - is that the' spent mordant' can be disposed of down the drain whereas copper sulphate mordant, used to etch zinc, has to be disposed of using a specialist.
Having said that I remember now, reading on Nik Semenoff's website
New Directions in Printmaking , that if you add something to it, the mordant becomes neutralized, making it safe to dispose of, in a domestic drain. The link takes you straight to the article.
I am so grateful to people like Nik, who generously share their research, their knowledge. It's something I really believe in and why I have always endeavored to give precise descriptions of my technical processes. Once a teacher always a teacher!!........ there is that as well.
But I have learned from others on the internet and I just want to repay the compliment.
Enough already!!
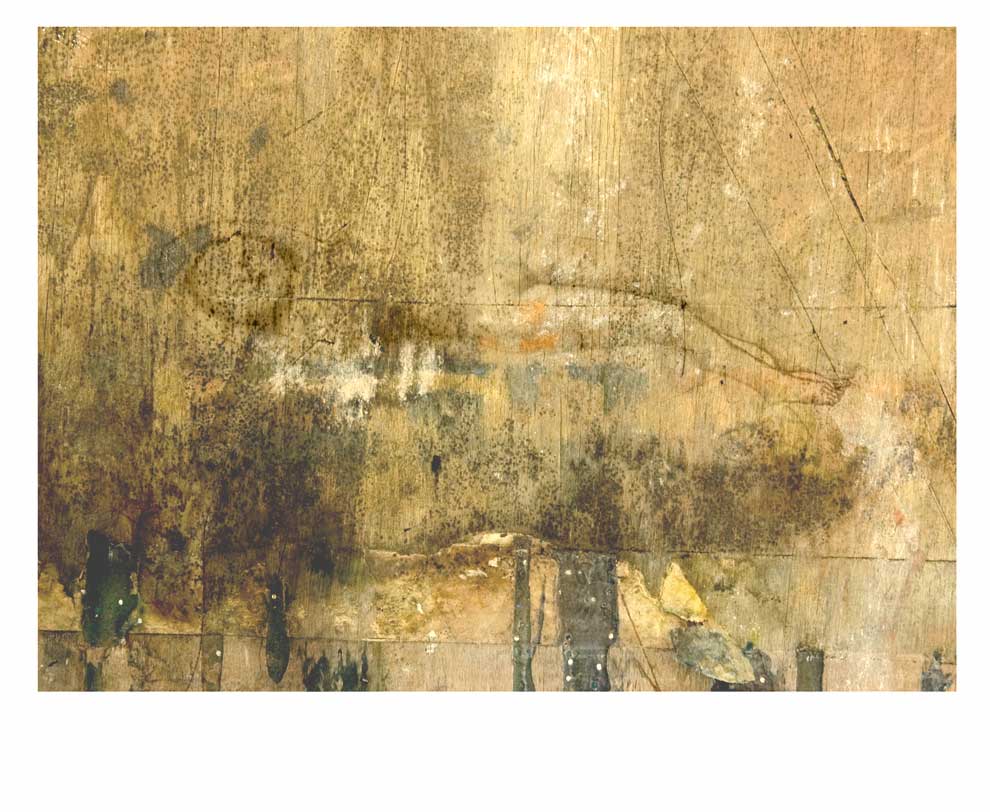
Anyway..........so then I took a proof and was kind of annoyed to see
that line crossing down the horizontal figure BUT as I knew I would be overlaying this, with a layer of ink from the inkjet printer - I figured it might be OK.
Of course then I had to go and start trying to be a clever clog- I got this notion that I could have parts of the layer being more transparent than others. Given that the layer has to have a degree of transparency in any event - I seem to remember that I got confused at this point. As can be seen from the image (turquoise colour), I was also trying to decide which color to go with.
By this time I had also scanned the proof into the computer so that I would be able to 'virtually" place in beneath my photoshop layer .
I also wanted to be able to output this layer of ink directly onto the paper. Measurements and registration was critical. I had to input the exact paper measurement that I was loading into the epson printer and have it as a 'custom setting'.
HOWEVER ....I got mixed up about which direction the image comes out of the printer. It has taken ages to get used to it and I can safely say that I am no longer intimidated by the beastly thing.
One of the problems with it has been that I use it now and again say on average once every 4 months so I kind of forget how to use it although I have by now printed out all the pages, that I need to refer to, from the PDF manual that comes with the printer.
Honestly you'd think with a printer that costs 7 or 8 hundred pounds (when I bought it) that they would be generous enough to supply it with a hard copy manual !! I have also written note on the uses of different types of paper although I mainly use printmaking paper. I HAVE tried their own brand paper such as their watercolour paper and the Bockingford double sided paper that you can buy from places like
John Purcell or
RK Burt. But there's something rather unpleasant about it in a tactile sense.
It took ages to get the paper to load into the machine and not show up on the screen as "paper loaded incorrectly" or for the paper to just spurt out of the machine.
I take it as a 'given' nowadays that I may have to do about 10 attempts before it finally realizes that I am not leaving the room and that it MUST bend to my will.
The other hurdle to overcome with using this printer is that it has three different entry points for the paper there is front feed, rear feed and upright feed. eeeek !!
Anyway if you click on the image above (fourth up from here) you can see that I got the inkjet image overlaying part of the etching .
Even though I 'misplaced' the layer of inkjet ink, I was soh thrilled I really was . What an achievement especially for me a technical nink-a-poop !!
I must have done a couple of more proofs as I seem to still have 2 that I can try this again on, it was late so I went to bed. This has yet to be resumed. I did this about five months ago now. It maybe something I use in a forthcoming project . We shall see...........we shall see.